Green onion bread
| Liquid material: | High-gluten flour 115 grams |
| Water 115 grams | Yeast 1g |
| Main dough material: | High-gluten flour 185 grams |
| Low gluten flour 80g | Fine sugar 60 grams |
| Whole egg liquid 30g | Water 85 grams |
| Salt 4 grams | Yeast 2.5 grams |
| Butter 30g | Ingredients for chive butter filling: |
| Butter 55g | Whole egg liquid 30g |
| Salt 2 grams | chopped green onion 20 grams |
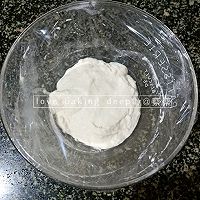
Step 1
First make a liquid starter (Polish starter), put 115 grams of water into a large container, add 1 gram of yeast, stir evenly, then add 115 grams of high flour and stir evenly until there is no obvious dry powder! Then put it in the refrigerator at about 5 degrees Celsius for 17-20 hours. If you are in a hurry, you can ferment it at room temperature, or you can ferment it at room temperature for two hours and then put it in the refrigerator. The water retention of the fermented dough will be better if it is refrigerated.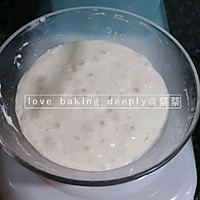
Step 2
Ferment to a moist state with many bubbles on the surface.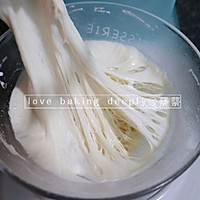
Step 3
As shown in the picture above, there is a lot of bubble mesh when it is torn open. The fermentation mainly depends on the state and there is no specific time. If you prepare the liquid seed at eight o'clock in the evening and put it in the refrigerator, it will be ready by eight or nine o'clock tomorrow morning, but it does not take 17 hours, but twelve or thirteen hours is fine.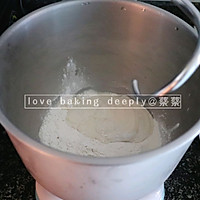
Step 4
Except for the butter, the main dough ingredients are put into the mixing bowl. The prepared liquid is placed on top and added together. I am used to putting the liquid at the bottom, flour on top, and then salt. I put the yeast in halfway because the room temperature in Guangdong is 25"br8" src="https://cp1.douguo.com/upload/caiku/d/3/0/200_d349d7a46a2a2a319c2824855acac850.jpg" alt="Scallion Bread❗ Illustration of how to make classic Taiwanese bread 5" />Step 5
After kneading to the expansion stage, add butter and knead until complete. There is a glove membrane that is elastic and not easy to break. If you cannot knead the glove membrane when making this kind of bread, a slightly thicker membrane will not have much impact. It is not as demanding as toast.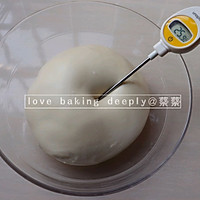
Step 6
Round the dough and place it in a bowl, basin or fermentation box. Pay attention to controlling the temperature of the kneaded dough not to exceed 28 degrees.
Step 7
Today I did not use a fermentation box for fermentation. I fermented it in a Cus 750 oven. The oven fermentation temperature of Cass 750 can be adjusted to a minimum of 20 degrees. The minimum fermentation temperature of many smart home ovens is 30 degrees. If the temperature of some ovens is too high, it is generally not recommended to use the oven first because some temperatures are too high. If you add too much, it will be over 30 degrees when you put it in, and it will be easy to overheat the bottom. The surface looks fine, but the bottom has been over-risen or is in the wrong condition, which will cause the second hair to have no tension and will not rise again during baking. This kind of problem will be more obvious when making toast. The temperature is adjusted to 25 degrees. There is no humidity in the oven to adjust. Put a bowl of warm water to maintain the humidity. The time I set is 40 minutes. Fermentation depends on the status, and the time can only be used as a reference.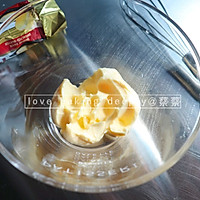
Step 8
While the dough is rising, you can make the buttery chive filling. The butter has been softened at room temperature in advance. As shown in the picture, it is softened. It is soft and can be easily poked with your fingers, just like making biscuits. It does not mean that it liquefies into water. Add the softened butter and salt and beat with a whisk until fluffy. You can use an electric whisk or a manual whisk. Just beat until soft and fluffy.
Step 9
Then add the egg liquid, 30 grams of egg liquid is added in three times, beat each time until evenly absorbed before adding the next time.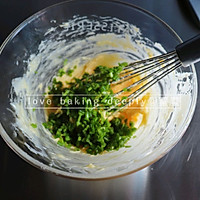
Step 10
Add the chopped green onions that have been washed and drained beforehand.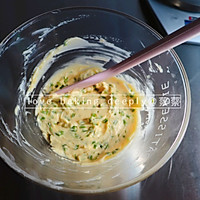
Step 11
Mix well with a spatula, then put it into a piping bag and set aside.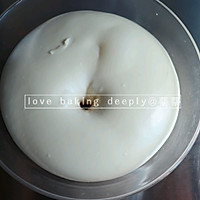
Step 12
Let it rise until it is about doubled in size. Dip your fingers in flour and poke holes without collapsing or shrinking.That is, fermentation is completed. If the weather is hot, the fermentation is complete if the bottom shrinks a little slowly. Don't let the bottom shrink completely. There is no specific time depending on the fermentation state. Look at the status, look at the status, look at the status! You must learn this. Many friends immediately ask: How long do I need to post? You tell me how long it takes, and I will do it according to your time... No, ha... This also has something to do with the temperature of the noodles.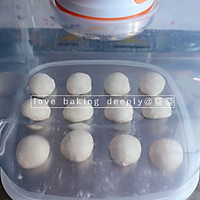
Step 13
After the first rise, gently tap and press the dough to deflate it, not knead it! After deflating, divide it into 12 equal portions, each one is about 60 grams (the exact number of grams is not specified, just divide it into 12 equal portions according to your dough. I like to make smaller ones, if you like bigger ones You can divide it into 8 or 10 pieces.) Roll into round balls and cover with plastic wrap to rest for 25 minutes.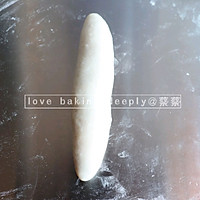
Step 14
Take a piece of relaxed dough, roll it into an oval or small piece, then thin the bottom edge and cut it from the topRoll up to the bottom and roll into an olive shape. When rolling, don't just roll it from top to bottom. When rolling, use a few fingers to press it gently, just like we shape toast. Roll it over and press it slightly with your fingers. The thin edges help to seal the mouth tightly. Some friends just roll it out and then roll it directly on the baking sheet. Because the cuff is thicker and the roll is smaller when rolling, it tends to tilt around. After the second hair is done, it may all fall to one side and the cinch is exposed upwards, which is not very beautiful.
Step 15
Fermentation is carried out in a warm and humid place with a temperature of 35-38 degrees and a humidity of about 75%-85%. Today's second batch was also made in the oven. The oven has no humidity to adjust, so I put a bowl of warm water in it to control the humidity. There are some differences between oven fermentation and fermentation box, but both can be used if the requirements are not high. Let it rise until it is about doubled in size, the surface is smooth, and the dough will spring back slowly when pressed lightly with your fingers. Pay attention to the state during the fermentation process. Fermentation depends on the state and there is no specific time. I used it for 35 minutes today, and I took it out when I was in good condition. After taking out the baked baking pan, remember to preheat the oven to 195 degrees.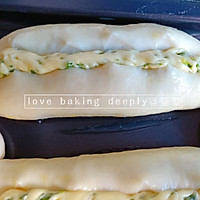
Step 16
After the second rise, brush the surface with egg wash (this egg wash is separate and is not within the parameters of the recipe table). After everything is brushed with egg wash, use a bread cutter or sharp scissors to cut or cut a slit in the middle of the bread. Then add the prepared butter and chive filling.
Step 17
Place in a fully preheated oven and bake at 180 degrees for 20 minutes. The temperature and time of my oven are just right on the surface. If the oven temperature is relatively high, you can adjust it appropriately according to your own needs, or you can cover the surface with tin foil. Please adjust the time and temperature according to the actual conditions of your respective oven.
Step 18
After baking is completed, remove from the mold and allow to cool on a cooling rack., when cooled to a little residual temperature, seal and store in a bag. Originally, I was going to use this picture as the cover. Who knew that the little bandit was not happy with it, and he said that he would be used as the cover. Well, seeing how cooperative you are every time when you are a hand model, I will cooperate with you once too. Haha~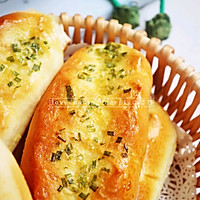
Step 19
While baking, the aroma fills the house. Bread and butter are a perfect match, plus the aroma of chives, I love it.
Step 20
I feel like there's nothing wrong with it except for the heat, haha~
Step 21
Seeing this picture, I also feel that it smells so good~ If you like to eat it, that is the greatest success~ Tips for cooking scallion breadMany friends said: I made it exactly according to the recipe, why is mine wet? Why is mine dry? Why... why... When making bread, you must flexibly control the liquid in the formula, because the water absorption of flour is different, and the climate temperature and air humidity are different between the north and the south. You must add it as appropriate according to the state of the dough. This is a commonplace topic. !
The time and temperature should be adjusted according to the actual conditions of your own oven. There is a big difference between a large oven and a small oven. Even two ovens of the same brand will have temperature differences.


