Yogurt Sea Salt Rolls
| High-gluten flour 420g | Low gluten flour 80g |
| Fine sugar 45g | Yoghurt 190g |
| Milk 170g | Milk powder 25 grams |
| Yeast 3 grams | Sea salt 10 grams |
| Butter 35 grams | Wrap the filling with 5-8 grams of butter each 16 |
Step 1
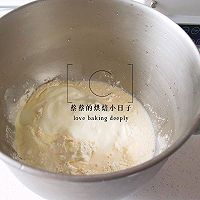
Except for the butter, put the rest of the dough ingredients into the bucket of the chef's machine. Because we used yogurt, the thickness of the yogurt determines the amount of milk. You can reserve a little milk first and add it as appropriate depending on the state of the dough. I used homemade sugar-free yogurt, but you can also use purchased ones. Try to use thicker original yogurt. As the weather gets hotter, salt can also be put in together with the butter, and yeast can also be put in before it is close to the expansion stage. This has been shared before.
Step 2
After kneading until expanded, add softened butter, add butter and knead until complete. The water content of this dough will not be very high. Pay attention to the extensibility and elasticity of the dough. You don't need to knead it so thin.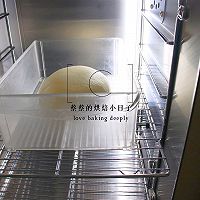
Step 3
Pay attention to controlling the temperature of the kneaded dough not to exceed 28 degrees. Round the dough and place it in a basin, cover it with plastic wrap, and perform basic fermentation in a warm place of 25 to 28 degrees. I fermented it in a fermentation box. The temperature of the fermentation box was adjusted to 25 degrees and the humidity was 75%. The time is set to approximately 35 minutes, mainly depending on the state of the dough, and the fermentation time is for reference only. Fermentation is complete when the dough is about 1.5 times in size, and when you poke a hole with flour into the dough without collapsing, and the bottom shrinks slightly and slowly, the dough is ready to ferment.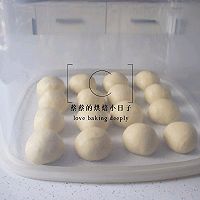
Step 4
After the first rise, pat the dough gently to deflate the dough. After deflating, divide it into 16 portions, roll into a round ball and cover with plastic wrap to rest for 15 minutes. The amount I made is 16. If you have a small oven at home, you can reduce the amount by half.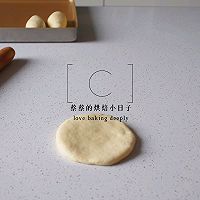
Step 5
Take a piece of relaxed dough, roll it out gently, and roll it into a small round piece.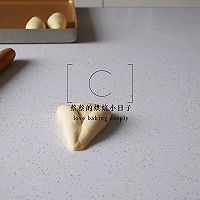
Step 6
Fold the dough on both sides as shown in the picture above, like a triangle.
Step 7
Fold it in half again and pinch the edge tightly. If you are not sure, you can watch the video technique.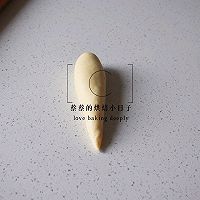
Step 8
Gently rub it into droplets with your hands.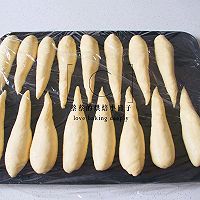
Step 9
Place the pre-shaped dough on the baking sheet. Be sure to moisturize it. You can lightly spray a little water and cover it with plastic wrap. You can also cover the plastic wrap with a wet towel. Place it in the refrigerator to rest for 45 to 50 minutes. .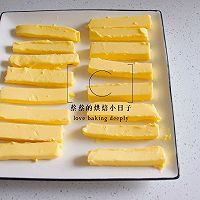
Step 10
Then cut 16 sticks and wrap them in butter, about 5-8 grams each. After dividing, place in the refrigerator to chill.
Step 11
Take a piece of dough that has been chilled from the refrigerator, roll it out roughly, as shown in the picture, and then gently turn it over so that the smooth side faces down.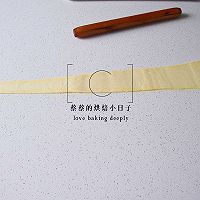
Step 12
Then use a rolling pin to gently roll out the dough. You can use your hands to help pull the dough and roll it out. You can watch the video for how to do it. The length of the rolled dough is about 45 to 50 inches. You can lightly brush a little softened butter on both sides, so that the baked layers will look better. Put the butter we divided in step 10 on the top of the dough.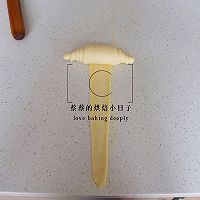
Step 13
Roll it up gently from top to bottom. When it reaches the last point, you can pick up the dough and roll it up gently with your hands.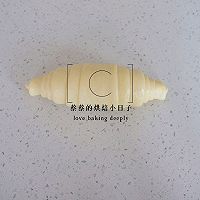
Step 14
Good plastic surgery look.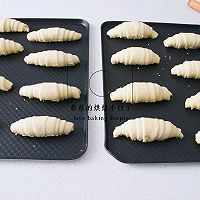
Step 15
Shape everything and place on the baking sheet.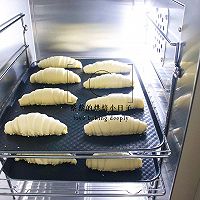
Step 16
Start the second serve. The final fermentation temperature of this bread should not be too high, generally 28 to 30 degrees, and should not exceed 30 degrees. I fermented it in a fermentation box with a temperature of 30 degrees and a humidity of 80%. Friends who don’t have a fermentation box can also use the oven for secondary fermentation. The oven cannot be adjusted accurately without humidity. You can put a bowl of warm water to maintain the humidity. The time is tentatively set at 30 minutes. There is no fixed time. The main thing is to observe the state of the dough. Ferment until about 1.3-1.5 times in size. The dough will be smooth and elastic. The dough will slowly rebound when pressed with your fingers. This bread does not need to rise too much. You can reserve a little bit, but it cannot be over-risen.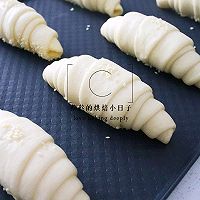
Step 17
After the second rise, spray a little water on the surface of the dough and decorate with sesame seeds.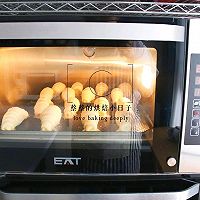
Step 18
Place the bread into a fully preheated Haishi SP50 open-hearth oven, set the upper heat to 225, the lower heat to 175, bake for 13 minutes, and spray steam for 5 seconds into the oven. The color of the sea salt rolls I baked using this oven at this time and temperature was just right to my satisfaction. Please adjust according to the actual temperature of your own oven.
Step 19
The bread is baking, and the flowing butter and sesame seeds combine together, making the bottom particularly crispy.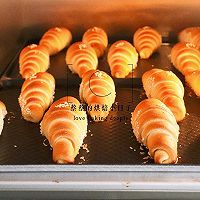
Step 20
The bread is baked and the color is so healing.
Step 21
After taking it out of the oven, unmold it and let it cool on a cooling rack. When it cools down to a little residual temperature, seal it and store it in a bag.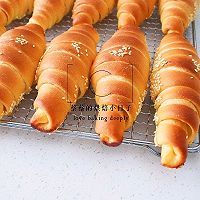
Step 22
Let’s make delicious and beautiful sea salt rolls together. I look forward to your work!
Step 23
This is a shorter and fatter shape.
Step 24
This is the elongated shape.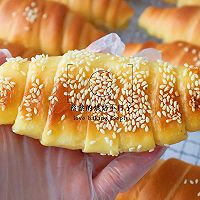
Step 25
The bottom is especially crispy after baking.
Step 26
Bread for healing! Yogurt Sea Salt Bread Rolls RecipeThe operating techniques and tips are all mentioned in the video. Please be patient and watch the video.
Many friends said: I made it exactly according to the recipe, why is mine wet? Why is mine dry? Why... why... When making bread, you must flexibly control the liquid in the formula, because the water absorption of flour is different, and the climate temperature and air humidity are different between the north and the south. You must add it as appropriate according to the state of the dough. This is a commonplace topic. !
The time and temperature should be adjusted according to the actual conditions of your own oven. There is a big difference between a large oven and a small oven. Even two ovens of the same brand will have temperature differences.


